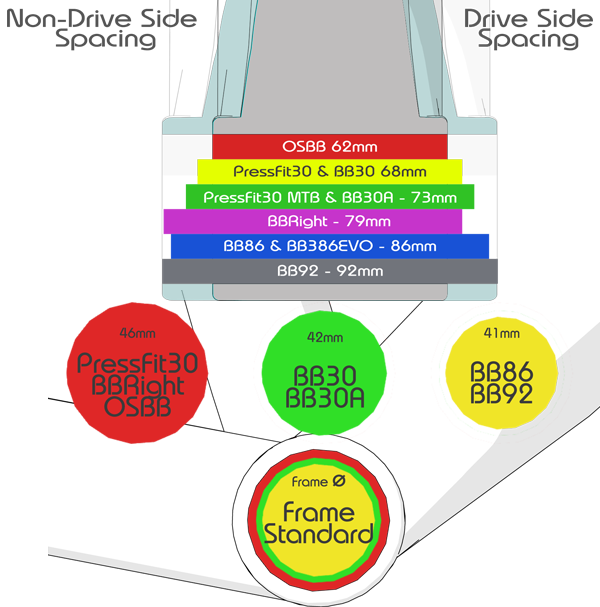
Bottom Bracket Selection Guide


Part 5 of 5: In this video we show how to press-fit a new BBInfinite bottom bracket module into the frame shell we just reamed to size. How well did it work? Let's find out. Check out:
and now it's time to install the bottom bracket after we've just finished reaming this hole to the proper 40.98 size to give us our interference and of course we begin all of this as we always do with a final cleaning now we just got done reaming this i used some tap magic in there which is an oil kind of an oil base there of course and but whatever you're using whether using 30 weight oil or whatever to do the reaming operation you got to get all that out of there because we're about to use retaining compound and the oil will follow it and it won't work so we need to just follow the instructions that are on the module itself full installation instructions are on that qr code plus it also has some stuff printed on there like face these downward which we are going to do and then i just chuck it up in there just like that and it should feel really normal normal is good in this regard all right so this is no cuts here show everybody kind of seeing how the sausage is made now i want to show you i pull back a little bit here because i want to show you that i am just using one finger to drive this right now all right i'm not having to grab it and go like ah and have somebody hold it over here if you're in here like and the veins popping out of your head the bottom bracket's not going to go in and if you do get it in uh it's going to be terrible so go back and watch the original video and uh and you'll know how to solve it so we go get that in there just like that and then we go through our normal procedure we always take the press apart always when we're halfway through it like this and we come back in and we do an inspection to make sure that the bottom bracket's not like off center or something like that or there's not a di2 wire or something getting pinched in there so we want to get visual confirmation push it over to the other side and get it in place and then we're going to put our retaining compound on just like this got my like little industrial strength uh retaining compound bottle going here this is how we work in the shop so anyway got that reset all right now i forgot the cup who set up the chute anyway all right so let's go ahead and we've got the correct side of the installation tool the cup facing the frame for bb-86 and bb-92 now this is critical with bb-86 and bb-92 all of those are going to pop out of the frame about a millimeter and a half on this side okay so if the cup isn't here it's just going to crash into the module essentially all right so she's going right on in now you hear that that's actually the retaining compound lighting off all right you see that this gets a lot of people see how it's not touching okay that's because it's the nose of the module is actually hitting that so what we want to do is we want to let a little off a little bit of pressure and then we'll come back at it still hitting all right there you go boom now it's in all the way see that you get a lot of i get a lot of people emailing us saying i got the bottom bracket about all the way in but it's still about a millimeter away and i can't go any further that's because the nose of the module is hitting this a lip right here and you just need to re-center it and as you saw get it in there well this is installed let's get the crank in there and do a spin test in our next video
Comments will be approved before showing up.
